Wednesday, May 13, 2015

Locking liner Carbon Fiber transtibial endoskeletal prosthesis

It is funny that the more comfortable I get with steps in the process the less pictures I take along the way. As I now look through the pictures I have I realize that many steps in the process were not documented. The plasterwork was largely omitted but it is very important to get the dummy lock lined up properly. Lets start today off with the drape formed check socket.
 This took some work. I began by attaching the bulldog locking liner dummy to my smoothed plaster model. This required that I drill into the plaster model enough to have the main bolt deep into the plaster.
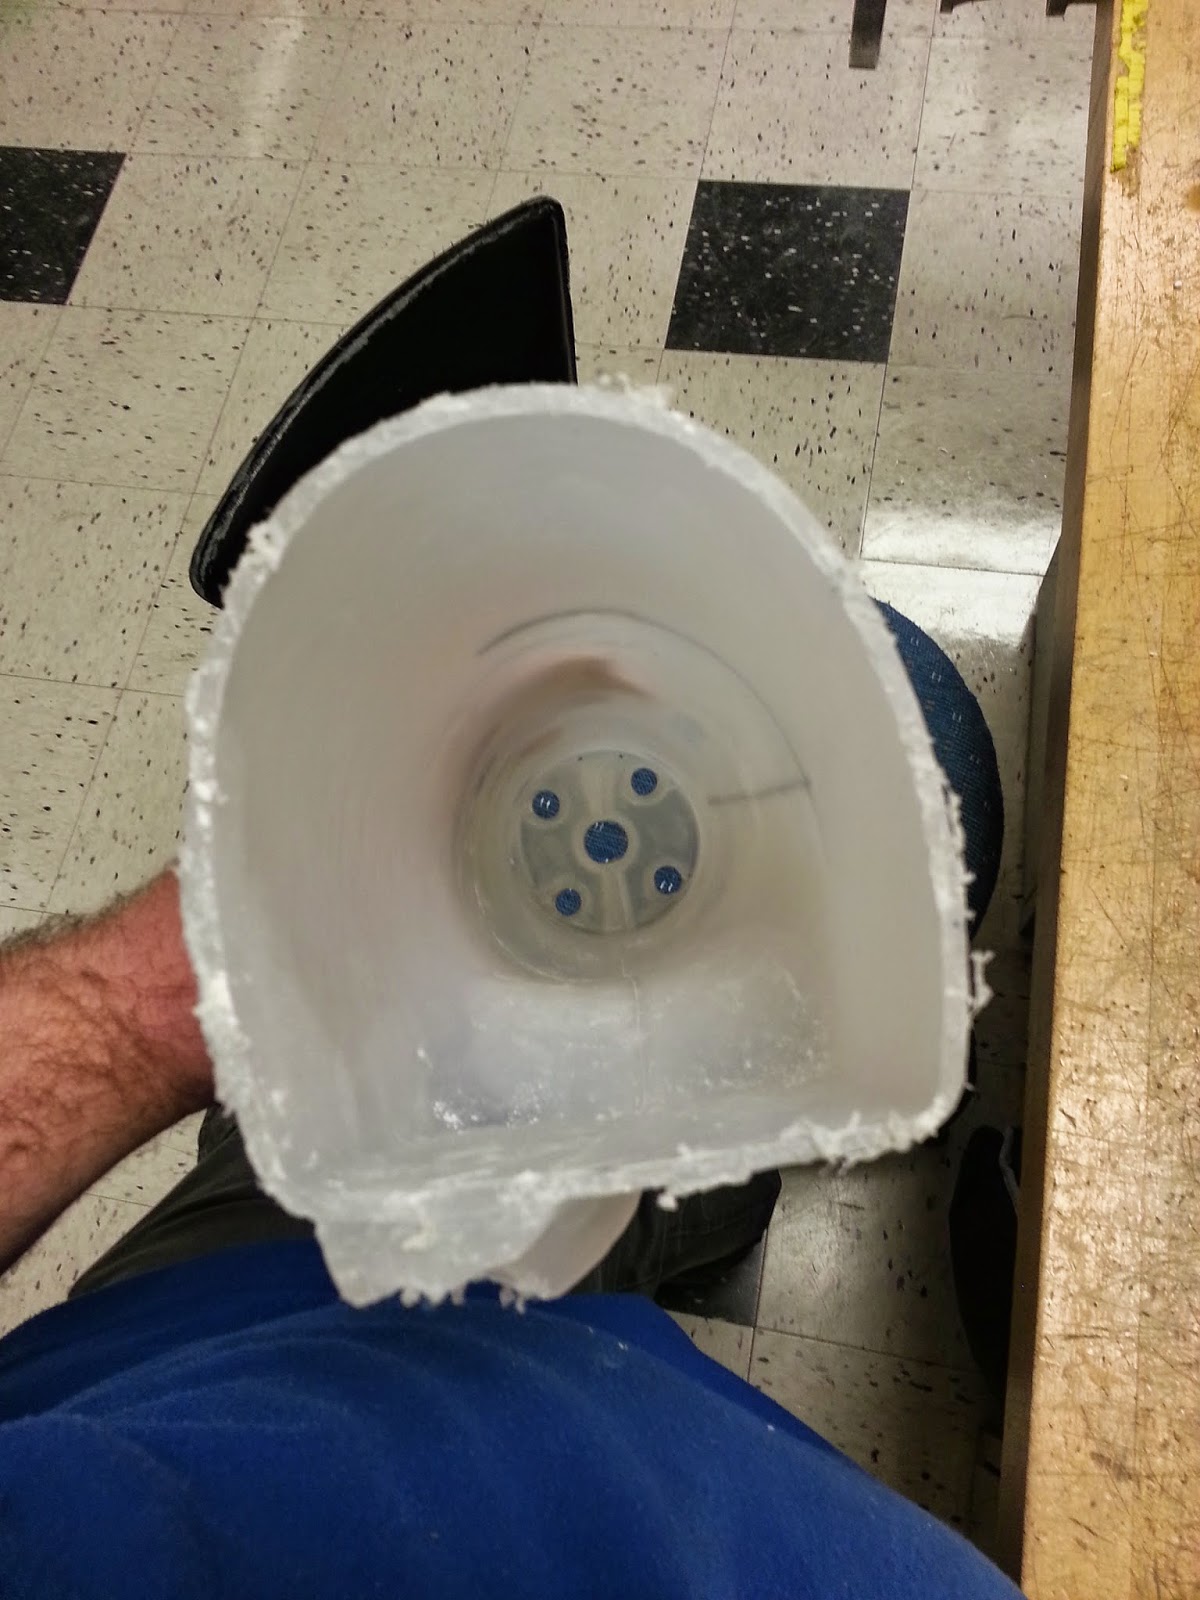
 I then heated the polyethylene plastic in our PDQ infrared oven until it was ready to pull and drape over the plaster model.
 I then removed the dummy and put the definitive locking mechanism into the bottom of the socket. Then I attached the pyramid component, pylon and foot. I marked my LOP and flexion and adduction lines.
 I have bench aligned the prosthesis now and am ready to pass it off to be dynamically aligned.


 After the dynamic alignment I need to capture the alignment and laminate, after which I would then transfer the alignment to the definitive socket.
 Here is my carbon fiber i-beam lamination lay up. It consisted of a layer of carbon fiber then a patch of carbon fiber for thickness over the circular dummy lock then three layers of nyglass then the final carbon fiber sleeve,

 Letting the AME resin soak into the carbon fiber lay up. Nice to use black pigment as well to keep things nice and dark.
 Here it is all hardened and ready to be trimmed out.
 Clay said that carbon fiber dust was not very friendly. I decided to fool around a little and dress like a wild west bandit. Needless to say I got made fun of. I however did not itch at all after trimming the socket out.
 That is thing of beauty. I love the look of carbon fiber. The lamination is thin and very strong.
 Here it is all assembled.

 I thought that it would be fun to set my foot next to the prosthetic device that I just made.
 Now it is all assembled and loctited so it is ready to go out the door.
The completed device with the liner installed. The liner would normally be rolled onto the patient before they stepped into the prosthesis. Because of the nature of the carbon fiber and the thinness of the lamination the dynamic alignment is done over weeks in a real setting. It seems to me that these sockets have no real wiggle room for after the fact modifications to relieve pressure points. They make great sockets for a patient that will not atrophy much more. 

I really enjoyed making this device and hope to work with carbon fiber more in the field.

Tuesday, May 5, 2015

Glow in the dark Supracondylar transtibial prosthesis

Another day another post I have a backlog of great ideas to show you. After a good quarter of prosthetic technician classes I was already formulating ideas on what I could do to try and set myself apart in the industry. After some searching I found some things that surprised me that nobody posted a whole lot of. I would now like to introduce you to my take on a glow in the dark prosthetic leg. No batteries required this one runs purely off of a resin additive.

Here I will start off showing some modifications that needed to be done to the check socket. This patients fibular head had shifted during the casting process so it needed to be relocated as well as some relief for the distal end of the tibia. I also made a built up pelite liner so the patient would slip into that then into the socket and friction over the epicondyles of the femur would retain the device on the patients residual limb.

 Here I am doing a one step lamination to get the pyramid component integrated into the socket. This layup involved a dacron bag with patches, 4 layers of nyglass, some fiberglass chop, the pyramid with fiberglass strands weaved through the wings, then I tied off 4 more layers of reflected nyglass to the pyramid component. Once that was done I sewed up my retro TMNT fabric and tied that off as well. At this point I lined up the pyramid component in line with the LOP of the socket and made sure I had 5 degrees knee flexion built in.

My video explaining what I am about to now explain.
 Here I have the outer PVA bag completely ready to put some resin into it.
 Now here is where the magic happens. I put the glow in the dark powder directly into my catalyzed resin and mixed it in just like I would have had I been using liquid pigment.
 Now I am waiting on my resin to set. There was some pooling of glow powder in some places but given the right fabric this would be unnoticeable. Either way those areas light up like the sun when it gets to be night time.
 I am making a foam cover for this device in class so next I put together a jacket for it.


 Next I was learning how to blow a socket off the plaster model. I had to be careful to not mar up the pelite liner I worked so hard on. So I drilled and stopped before I hit the liner. Then I took the air hose and introduced air into the hole. The jacket came pretty easily the socket took some nudging with the wood and a hammer and an extra set of hands.
 There it is in all its simplicity.
                                                                Components attached and trimmed out.

 So this is a chore. First off I started off by hogging out the hole in some medium density foam like you see in the background there. At that point I put the jacket in and made sure that everything fit before I glued it. Next morning I came in and shaped the leg. I found that I had been to heavy handed with the Trautman and taken to much foam away on the initial hole so I had to repair it.
 Doesn't look to bad after all of the repair work. Kind of looks patch worked but the shape was nice.
 Here I have all the parts for final assembly and loctiting.
 Final assembly. I really can't see much of the pattern on it but it does glow even down the interior of the socket.
 Here come the glamor shots. This is what I envisioned the whole time. It turned out beautifully.

And that my friends is a glow in the dark prosthetic leg.

Acknowledgments
Yenny Cocq is a wonderful artist that supplied me with the glow in the dark resin additive. She is a pleasure to work with.

https://www.etsy.com/shop/ResinArtSupply

Raymund Morales is a talented photographer and an all around professional at what he does. He captured the glamor shots you see here at the end. I could not be happier with the shots. He is also very professional in setting up times to work with. Definitely check out his work.

http://www.rmoralesphoto.com

This is me signing off have a great day.

Melvin

Monday, May 4, 2015

PTB Exoskeletal Prosthesis

Alright lets get down to business. I have never really worked with plaster before. We started off by using plaster bandage to wrap a positive model so that we could get a feel of how that would be.
As a technician we would not be called on to cast anybody. Although I could help the initial cast and shaping is done by the CP. It was good practice for when I do become a CP.
After I poured plaster into my negative wrap it was time to see the fruits of my labor.
 That is mighty fine if you ask me. Time to do some plaster smoothing.
 Here is a shot of my first ever check socket we use polyethylene to save cost instead of copoly. Copoly is used in the field for check sockets.


 Here are a couple pelite liners that are a work in progress.
 Here is my dacron bag and 6-8 layer internal socket layup.
 Here is my dark skin pigment resin beginning to saturate the fibers of the nyglass.
 One selfie for the cause.
 Tying of the reservoir so the is less grinding away in the end. 

Here is my rough formed socket. I have removed the pelite liner and and making ready to put my trimlines in place.
 
 Socket trimmed out MPT marked pelite liner extends above brim for easy extraction.
 Rough sanded, bisector lines and knee flexion and adduction lines referenced. Mounted up in a VFJ.
 For class we used Berkly alignment fixtures to get us acquainted with the alignment issues of tilt, slide, flexion, translation, rotation, and length.
 Now here is just a nice shot of that leg.
 Ready for dynamic alignment with the hip belt and cuff strap suspension system.
 I transferred the the dynamic alignment using the VFJ and foamed the ankle block attachment into place.
 That looks like a misplaced calf if I ever saw one. Actually I am just knocking foam away to find the leg in there.
 That's more like it
 Here we go putting the exo lamination on.
 Now that looks like a pretty nice leg if you ask me.
 Plastizote distal end pad.

Here I am putting this leg through its paces. I will admit I was a little hesitant at first. Turns out these things are tough.
Damage repair

Alright leg you have given me a start and I think I like it.